12 May, 2020

HOW TO FLASH RECOVERY AND BOOT IMAGE ON OPPO A37FW (FIX WIFI WONT WORK AFTER ROOT)


                      HOW TO FLASH OPPO A37FW  RECOVERY AND BOOT IMAGE 

   Flashing new boot image on oppo A37fw is mainly for fixing boot loops and fixing wifi not working after root.

1.Download oppo tools apk here
                                                     Link2
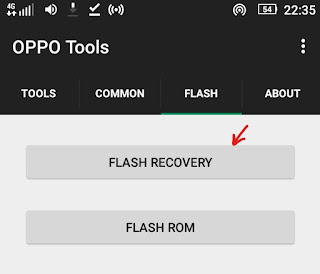
 2.Open the app  and  tap on flash option at the top right corner 

(In flash recovery option you can flash any image including boot image but dont flash boot image from here ,to ensure flash is done right you have to reboot into recovery mode and flash boot  image  and  recovery  from there)
 Tap on flash recovery   


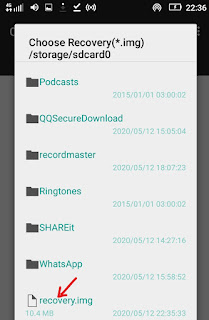
 3.Locate the recovery.img file and tap on it  to flash(flashing recovery flashes correctly from oppo tools apk )   
OPPO A37fw TWRP RECOVERY IMAGE  DOWNLOAD


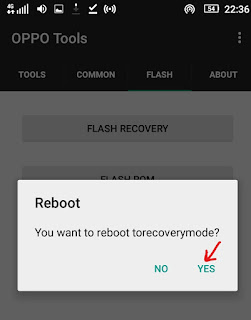
4After flash is done you will see an option to reboot into recovery select yes
 (your phone will reboot into recovery mode)


5.In recovery mode ,swipe right to allow modifications then tap on install 


6.Select on install image option then locate the boot image file (you can also flash recovery image from here)
7.Now you have to choose on which partition to flash select boot image then swipe right to flash 

8.After flash done a notification will appear at the top written ''successful''
9.Reboot bootloader to write the flashed image into the devices internal storage


STOCK FIRMWARE

                         
                                                   OPPO
                           
                         OPPO A37FW  STOCK FIRMWARE
    
OPPO_A37fw_miui8  Download link

OPPO_A37Fw_MSM_8916_5.1.1_QPST Download link

OPPO_A37Fw_MSM8916 2   Download link    


                                              LENOVO

               LENOVO VIBE P1M STOCK FIRMWARE

Lenovo vibe p1ma40 usr 010 firmware  link

Lenovo vibe p1ma40 usr 025 firmware  Link          

Lenovo vibe p1ma40 usr 040 firmware  link

vibe p1ma40 usr 027 firmware  link
        

LATEST WINDOWS SIGNED USB DRIVERS

                                   
                                    LATEST USB DRIVERS


Latest windows usb drivers    Download link 1
                                                Download link 2  


02 May, 2020

Top 5 Ways To Limit Windows 10 Data Use Over a Metered Connection

     HOW TO LIMIT WINDOWS 10 DATA USAGE OVER METERED CONNECTION        

         Due to limited bandwidth a lot of people especially those living in rural areas tend to find ways and means to set data  usage limit but to no avail .On this blog am going reveal to you five simple tricks to limit data usage on windows 10.I also encountered many problems  after I upgraded to windows 10 as my data bundles always got eaten up very fast but I later discovered the tricks .Follow my guide below to limit your data usage on windows 10.


                       TOP 5 WAYS TO LIMIT WINDOWS 10  DATA USAGE

1.Set your network as a metered connection

  • Launch windows settings
  • Select  'Network & Internet' option  
  • Click on network you are connected to then click change connection properties
  • Toggle on set as metered connection option.

2.Disable windows automatic updates and background intelligent transfer
  • Search for task manager on the search icon
  • On the task manager click on services at the top right corner
  • Then click on open services
  • Right click on windows update then on properties and disable automatic updates
  • Right click on background intelligent transfer then on properties  to disable it.    


3.Turn off live tiles

  • Open microsoft store then click on settings
  • Under settings turn off live tiles and automatic apps update.        

4.Disable background apps      

  • Launch the windows settings menu
  • Click on privacy    
  • Scroll to the bottom left and click on background apps
  • Tap on let apps run in background and switch it off

      When you update windows  the settings for background apps will reset so remember to check regularly.


5.Turn off windows sync


  • Launch the windows settings menu then click on accounts
  • Click on sync your settings on the left bottom corner 
  • Toggle off the sync settings option.   


To view the tutorial click on the video below