12 May, 2020

HOW TO FLASH RECOVERY AND BOOT IMAGE ON OPPO A37FW (FIX WIFI WONT WORK AFTER ROOT)


                      HOW TO FLASH OPPO A37FW  RECOVERY AND BOOT IMAGE 

   Flashing new boot image on oppo A37fw is mainly for fixing boot loops and fixing wifi not working after root.

1.Download oppo tools apk here
                                                     Link2
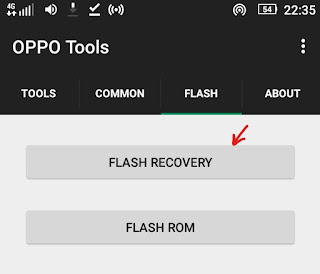
 2.Open the app  and  tap on flash option at the top right corner 

(In flash recovery option you can flash any image including boot image but dont flash boot image from here ,to ensure flash is done right you have to reboot into recovery mode and flash boot  image  and  recovery  from there)
 Tap on flash recovery   


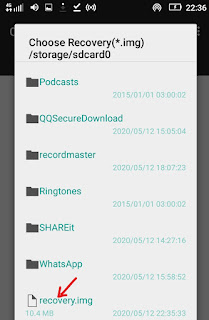
 3.Locate the recovery.img file and tap on it  to flash(flashing recovery flashes correctly from oppo tools apk )   
OPPO A37fw TWRP RECOVERY IMAGE  DOWNLOAD


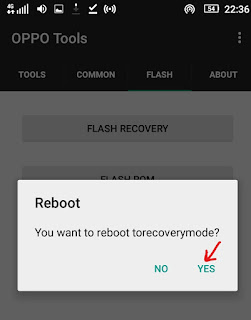
4After flash is done you will see an option to reboot into recovery select yes
 (your phone will reboot into recovery mode)


5.In recovery mode ,swipe right to allow modifications then tap on install 


6.Select on install image option then locate the boot image file (you can also flash recovery image from here)
7.Now you have to choose on which partition to flash select boot image then swipe right to flash 

8.After flash done a notification will appear at the top written ''successful''
9.Reboot bootloader to write the flashed image into the devices internal storage


STOCK FIRMWARE

                         
                                                   OPPO
                           
                         OPPO A37FW  STOCK FIRMWARE
    
OPPO_A37fw_miui8  Download link

OPPO_A37Fw_MSM_8916_5.1.1_QPST Download link

OPPO_A37Fw_MSM8916 2   Download link    


                                              LENOVO

               LENOVO VIBE P1M STOCK FIRMWARE

Lenovo vibe p1ma40 usr 010 firmware  link

Lenovo vibe p1ma40 usr 025 firmware  Link          

Lenovo vibe p1ma40 usr 040 firmware  link

vibe p1ma40 usr 027 firmware  link
        

LATEST WINDOWS SIGNED USB DRIVERS

                                   
                                    LATEST USB DRIVERS


Latest windows usb drivers    Download link 1
                                                Download link 2  


02 May, 2020

Top 5 Ways To Limit Windows 10 Data Use Over a Metered Connection

     HOW TO LIMIT WINDOWS 10 DATA USAGE OVER METERED CONNECTION        

         Due to limited bandwidth a lot of people especially those living in rural areas tend to find ways and means to set data  usage limit but to no avail .On this blog am going reveal to you five simple tricks to limit data usage on windows 10.I also encountered many problems  after I upgraded to windows 10 as my data bundles always got eaten up very fast but I later discovered the tricks .Follow my guide below to limit your data usage on windows 10.


                       TOP 5 WAYS TO LIMIT WINDOWS 10  DATA USAGE

1.Set your network as a metered connection

  • Launch windows settings
  • Select  'Network & Internet' option  
  • Click on network you are connected to then click change connection properties
  • Toggle on set as metered connection option.

2.Disable windows automatic updates and background intelligent transfer
  • Search for task manager on the search icon
  • On the task manager click on services at the top right corner
  • Then click on open services
  • Right click on windows update then on properties and disable automatic updates
  • Right click on background intelligent transfer then on properties  to disable it.    


3.Turn off live tiles

  • Open microsoft store then click on settings
  • Under settings turn off live tiles and automatic apps update.        

4.Disable background apps      

  • Launch the windows settings menu
  • Click on privacy    
  • Scroll to the bottom left and click on background apps
  • Tap on let apps run in background and switch it off

      When you update windows  the settings for background apps will reset so remember to check regularly.


5.Turn off windows sync


  • Launch the windows settings menu then click on accounts
  • Click on sync your settings on the left bottom corner 
  • Toggle off the sync settings option.   


To view the tutorial click on the video below 


21 April, 2020

HSPA MODEM NO DEVICE ERROR FIXED


                       HOW TO  FIX HSPA MODEM NO DEVICE ERROR


      If your HSPA modem cant show even when the device is attached follow the following steps to troubleshoot and automatically fix HSPA modem no device error:

1.First  you have to uninstall then reinstall the the device and the drivers
To uninstall the drivers :

                     
  • click on search icon and  search for device manager
  • On the device manager click on Ports(COM&LPT)
  • Right click on each of the modem drivers and click the uninstall driver option


To uninstall the device(hspa modem) 


Note;Close  hspa modem first before uninstallation


  •  Click on search icon and search for control panel 
  • On the control panel navigate to Programs
  • Click on uninstall a program
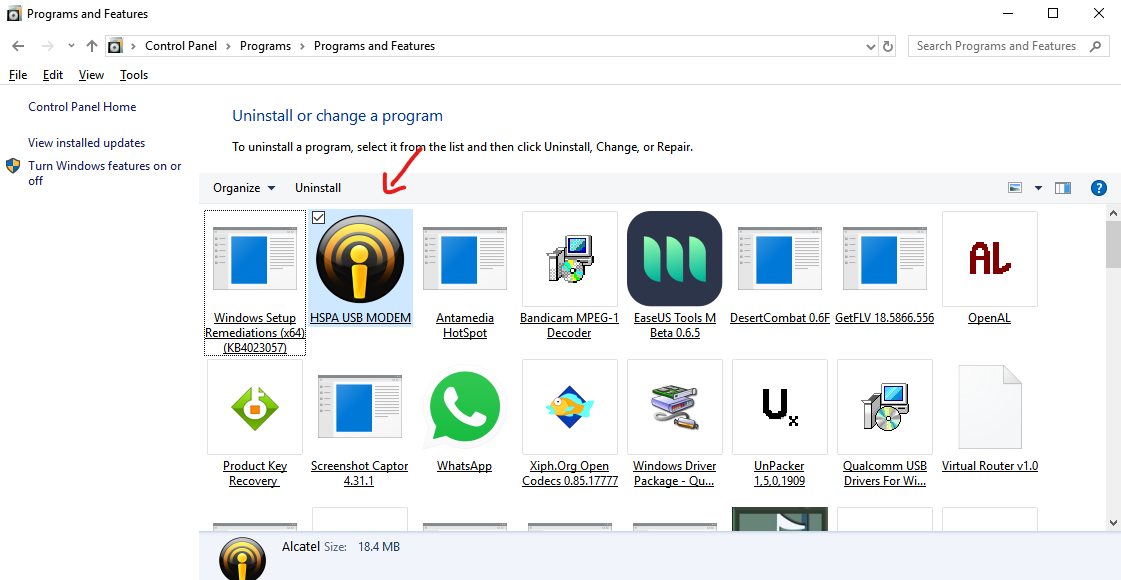
  • Right click on the hspa modem
  • Follow the onscreen instructions.
  • Reboot your computer

To reinstall the device and the drivers : 


  • Attach the hspa modem to your computer 
  • Navigate to my pc and click on hspa modem cd drive 
  • Right click on autorun.exe file then select run as administrator
  • Follow the onscreen instructions to install the device and the drivers    
 If the error  is still there  follow step 2

2.  Run the program in compatibility mode for previous windows versions


  • Right click on hspa modem 
  • Click on  properties  then click on compatibillity
  • Click on compatibility troubleshooter
  • All done now restart the modem


HSPA MODEM DRIVERS LINK


If the error was not solved click on the link below to view the tutorial and
fix the error easily.


https://www.youtube.com/watch?v=R7MvW81oEtc&t=55s


17 April, 2020

HOW TO INSTALL AIRCRACK-NG ON TERMUX FOR ALL ANDROID DEVICES

         How To Install Aircrack-ng On Android Using Termux

how to install aircrack-ng in termux


In this article i will shows you how to install aircrack-ng in android using Termux application.
Aircrack-ng is a network software suite consisting of a detector, packet sniffer, WEP and WPA/WPA2-PSK cracker and analysis tool for 802.11 wireless LANs. It works with any wireless network interface controller whose driver supports raw monitoring mode and can sniff 802.11a, 802.11b and 802.11g traffic

Requirements 

rooted device
Termux APK

Install aircrack-ng in Termux :

  1. First you need a rooted device
  2. Now download Termux apk
  3. Open termux application and update using apt update
  4.  install the root package using apt install root-repo command.
  5. Now install the aircrack-ng using apt install aircrack-ng command 
  6. after the installation of aircrack-ng in Termux run this tool using sudo su command e.g: sudo airmon-ng  

    Click on the  video below to view the  tutorial.

TOP 3 WAYS TO FIX .NET FRAMEWORK ERRORS

             TOP 3 WAYS TO FIX .NET       FRAMEWORK ERRORS


         Nowadays so many people complain about Microsoft  .NET framework.A major issue with .NET is it’s huge in terms of disc space and its also getting bigger with every release.Another issue is the large amount of security fixes for it and also  large proportion of Windows updates will likely be .NET framework related.                

            The .NET framework doesn’t really impact on system performance but what it does do is install thousands of files, folders and registry entries onto your system.With so much data surrounding .NET and the complexity of the installs it’s quite easy for updates to fail or the framework itself fail because something has been corrupted and programs that rely on it won’t run. Here i will show you some various ways to fix .NET Framework issues.


Read More: https://www.raymond.cc/blog/uninstall-microsoft-net-framework-with-aaron-stebner-cleanup-tool/


   1. Microsoft .NET Framework Repair Tool

      
  •  Download and run the .net framework repair tool .The repair test will run 9 different tests to analyze the system problems and fix them issues automatically.


  • The tool will repair only repair the versions of .NET that have been installed either by you or Windows update.
  • On the tool try all the options to fix  Net framework errors


2. Repair .NET Framework via Programs and Features  

  •  Go to Windows Start Menu -> Control Panel -> Add or Remove Program 

 
  • Select Microsoft .NET Framework 4 Extended listed in programs and features.
  • Click Change/Uninstall, Remove or Repair.
  • This will launch a Setup Wizard.
  • Select the Repair option, click Next.
  • The wizard will perform a repair on the .NET Framework installation.
  • Restart the Computer.
NOTE: The  Net framework function is only available in windows xp,vista and 7 only


This program removes the .Net framework completely from your system allowing for a clean reinstall


After cleaning up the Net framework  reinstall by either updating windows or downloading the  latest Net framework update for your OS.                         


   4 .  HOW TO  TROUBLESHOOT .NET FRAMEWORK ERROR


Watch the video tutorial below: